Cowan iAudio x5 repair
I use an Cowon iAudio x5 with Rockbox to play my ogg vorbis files.
Its quite an old player now, but it fits my needs and I don't see the point of buying new stuff when this works. As expected I've had to replace a few batteries in it not a big deal. I've also fixed the headphone jack as it had come loss some time a go. ( you can see the white pad on top to give it more pressure in the images below)
All of the x5 owners know about the little joy stick and how quickly it fails. Mine had been on the way out for around a year now(pretty good given its close to 5 years old), back stopped working then down, then select now its useless.
Me been me, I guessed I could fix it! Your going to need to find a replacement joystick. No idea who made the original or what the part number is. After a lot of reading I found the "TPA511GLFS" made by ck components.
You can buy this online via Mouser or Digikey. I got mine via Digikey. There part number is 401-1130-6-ND Digikey will sell in one lot quantities so that works for me.
Your going to need a decent Soldering Iron, personalty I recommend Hakko. I used the FX-888 for this work.
So hear we go!
-
Undo the four screws at the back of the unit. Remove the tape holding down the wires. Keep the tape.
 2)
Remove the HDD by sliding the front edge of the battery (where the connector is) forward and up its a little tight! Unclip the HDD from the main PCB by gently lifting upwards on the connector.
Now remove the headphone and FM assembly along the top of the unit. Undo two black screws and lift gently from the opposite side to the headphone jack.
Remove the black HDD protector.
Your player should look like this :

-
Now unscrew all the black screws you can find, there are lot! Also remove the two silver screws at the base of the unit holding down the metal HDD clip. At this point I also un solder the battery to get it out of the road and as a safety measure. Note the pad with the box is the positive wire and the far side is the negative wire the middle pad is not used.
 Now your ready to remove the main PCB. Undo the tape and keep it. Remove the black support near the white plug on the top of the unit.
Now lifting gently from the side with the USB port at the top of the unit. Lift upwards take care of the switches they are very fragile. If you need to bend the plastic a bit near the switches and the USB port. Once you have cleared that pull the board towards the top of the player and out of the case. Turn the main board over it should look like this.
 The silver joystick cover can now be popped off. along with the sticky sponge.
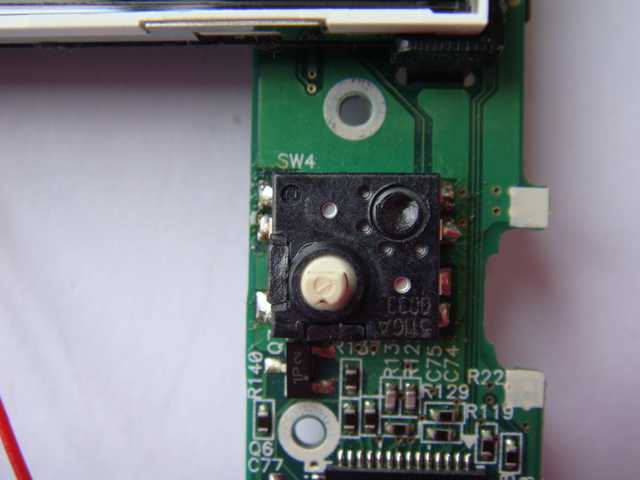
Hear is the bare switch:-
 4)
De-solder the switch. I like to use de soldering braid but what ever method works for you.
Switch removed, need to clean the pads lots of flux :-
 5)
Position the new switch as close to where the old one was a possible. The pads allow for a lot of moment and if your to far left or right you're joystick will miss the hole! The pins line up exactly as the old switch.
New switch on :-
 5)
Reassemble the unit and test all functions. The main PCB be be fiddly to get back in. I like to insert the bottom connector first then push the USB plug down and slowly push down on the side with the switches taking good take to not brake the switches.
Your done!
References :
